How to Use PCSX2 Emulator to Play PS2 Games
In this guide, I’ll show you how to set up PCSX2, the PlayStation 2 emulator, and play your favorite PS2 games on PC.
Download and Install PCSX2
First, download the PCSX2 emulator:
Click here to download PCSX2.
Alternatively, you can also download it from my server:
ps2.aimisayo.com
After downloading, extract the PCSX2.7z file using 7-Zip.
Configure PCSX2
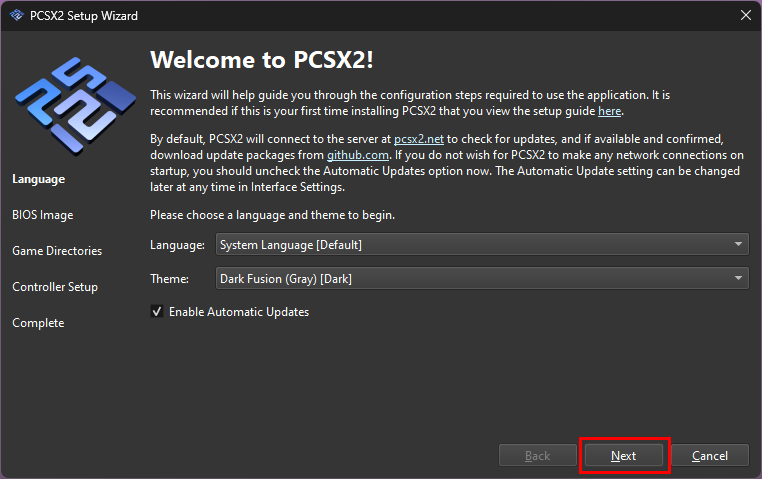
After extracting the files, open PCSX2 (pcsx2-qt.exe). A setup wizard will appear. Follow the steps below:
Step 1: Select Language and Theme
Choose your preferred language and theme, then click Next.
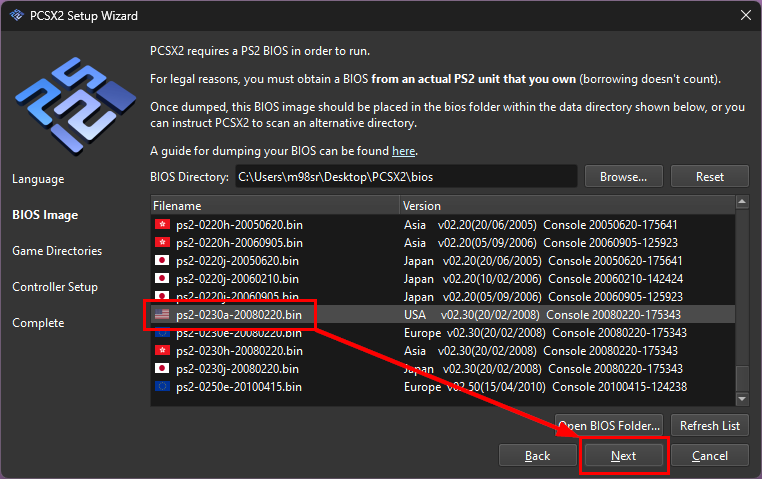
Step 2: Install BIOS
PCSX2 requires a PS2 BIOS file to run games. I’ve included the necessary BIOS files in the PCSX2 zipped file you downloaded. These BIOS files were dumped from my own PlayStation 2 console.
Note: Always comply with applicable laws when using emulation software.
I am not responsible for any issues or damage caused by the software. By following this guide, you agree to take responsibility for any risks.
- Click Browse to locate the BIOS folder inside the extracted PCSX2 directory (not the one in Documents).
- Select the appropriate BIOS (e.g., ps2-0230a-20080220.bin for stability).
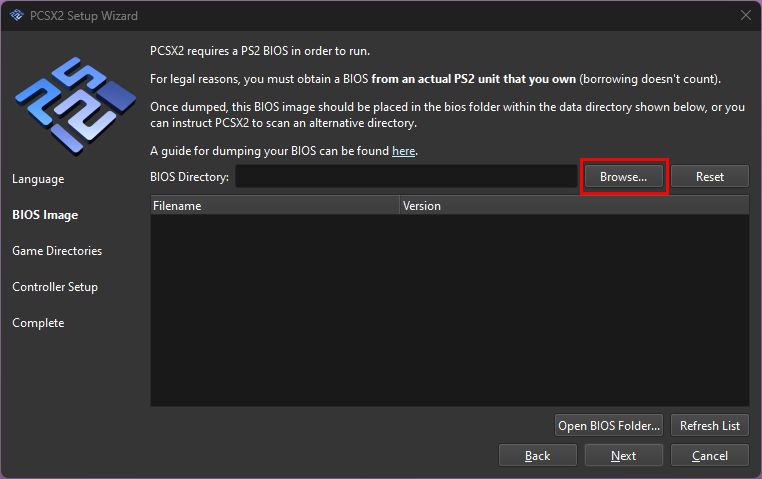
After selecting the BIOS, you’ll see multiple versions appear. From my experience, the most stable one is ps2-0230a-20080220.bin.
Note 1: If you have Japanese games, select ps2-0230j-20080220.bin for better compatibility.
Note 2: For multiplayer games, match the BIOS region to the game’s region. For example, use a European BIOS for games with SLES serials.
After selecting the BIOS, click Next. You can change this later if needed.
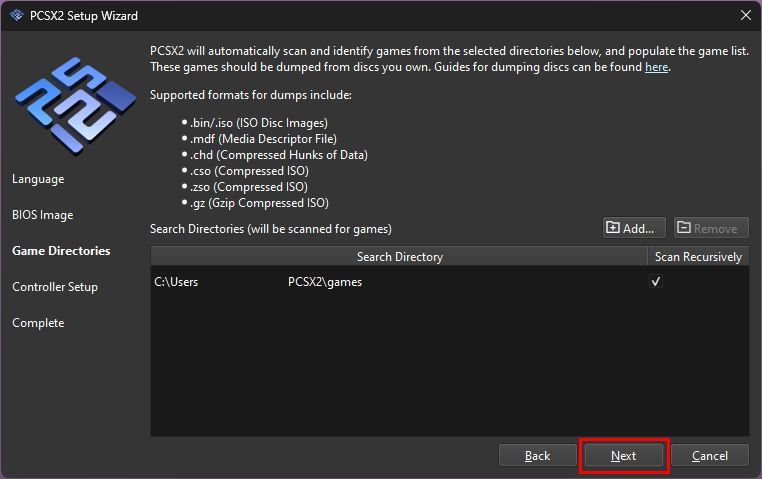
Step 3: Add Games Folder
You need to add a folder where your games are stored. I recommend downloading games into a dedicated folder inside the PCSX2 directory.
- Click Add to select your games folder.
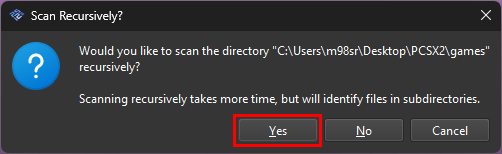
- Choose the folder inside the PCSX2 directory and click Select Folder.
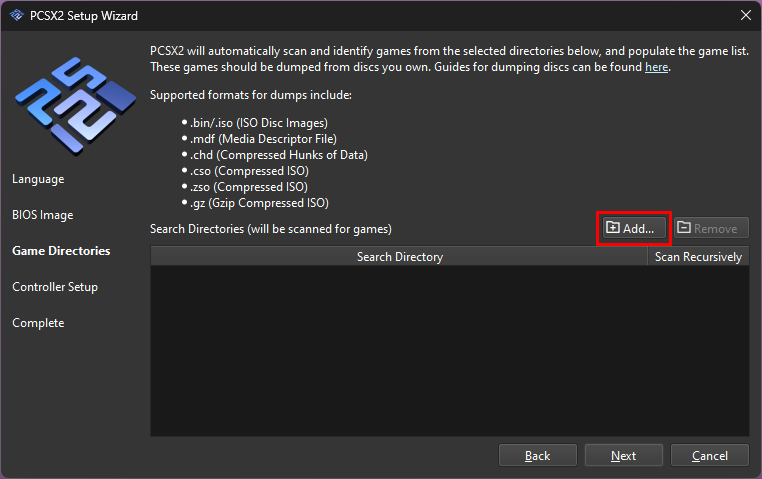
You’ll be asked if you want to scan the folder for installed games. Click Yes.
Click Next to accept the new games folder.
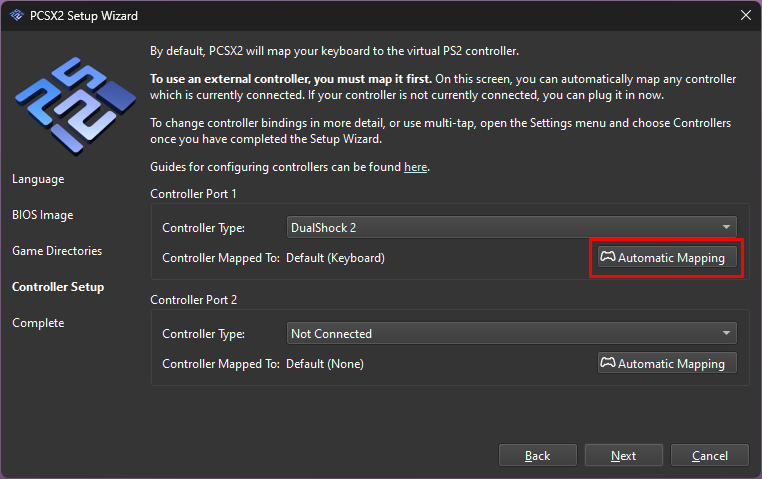
Step 4: Add Controller
By default, PCSX2 will use your keyboard as a virtual PS2 controller. To set up a game controller:
- Click Automatic Mapping under Controller Port 1.
- Ensure your controller is connected and press any button to register it.
For PlayStation controllers, select SDL controller. Xbox and third-party controllers will be shown as Xinput controllers.
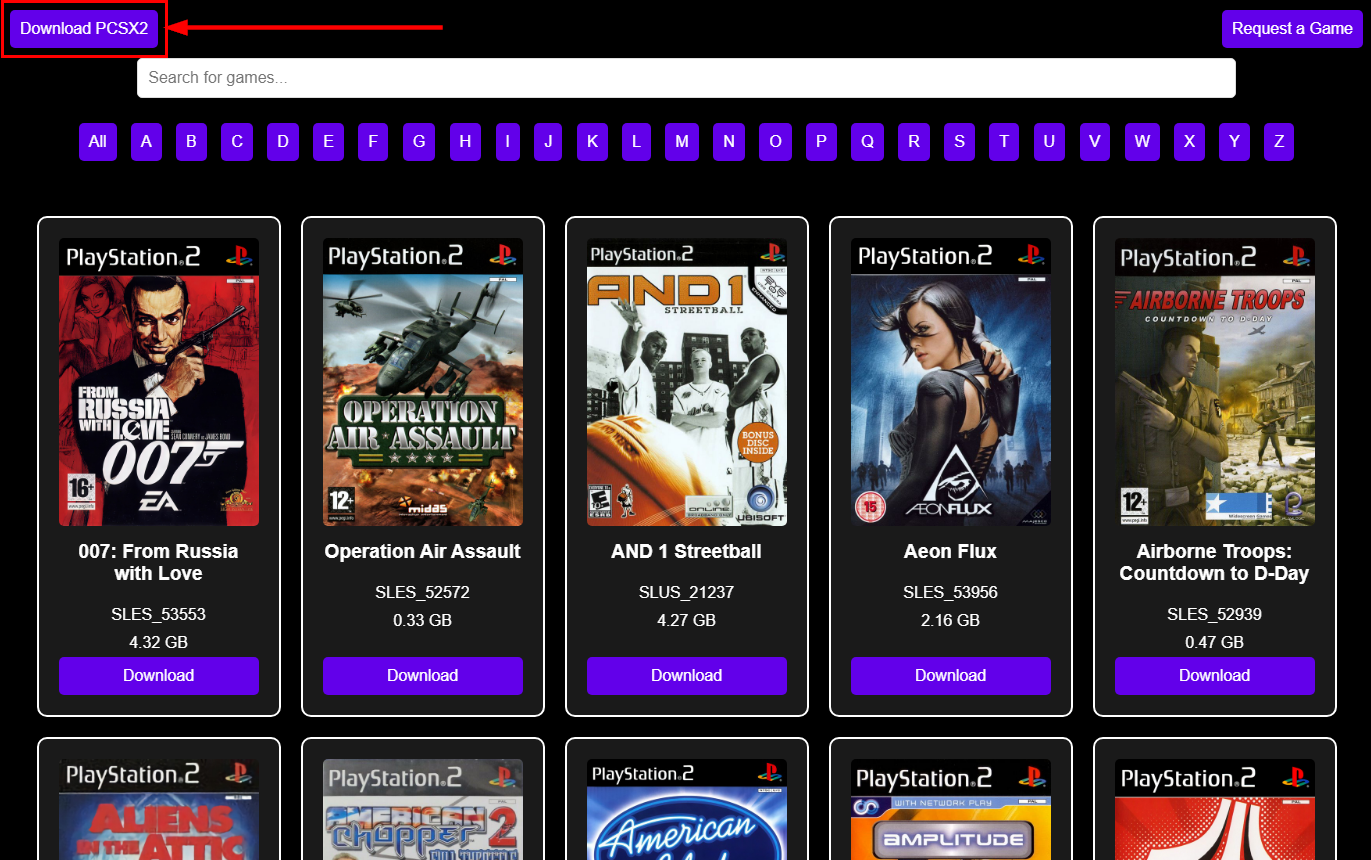
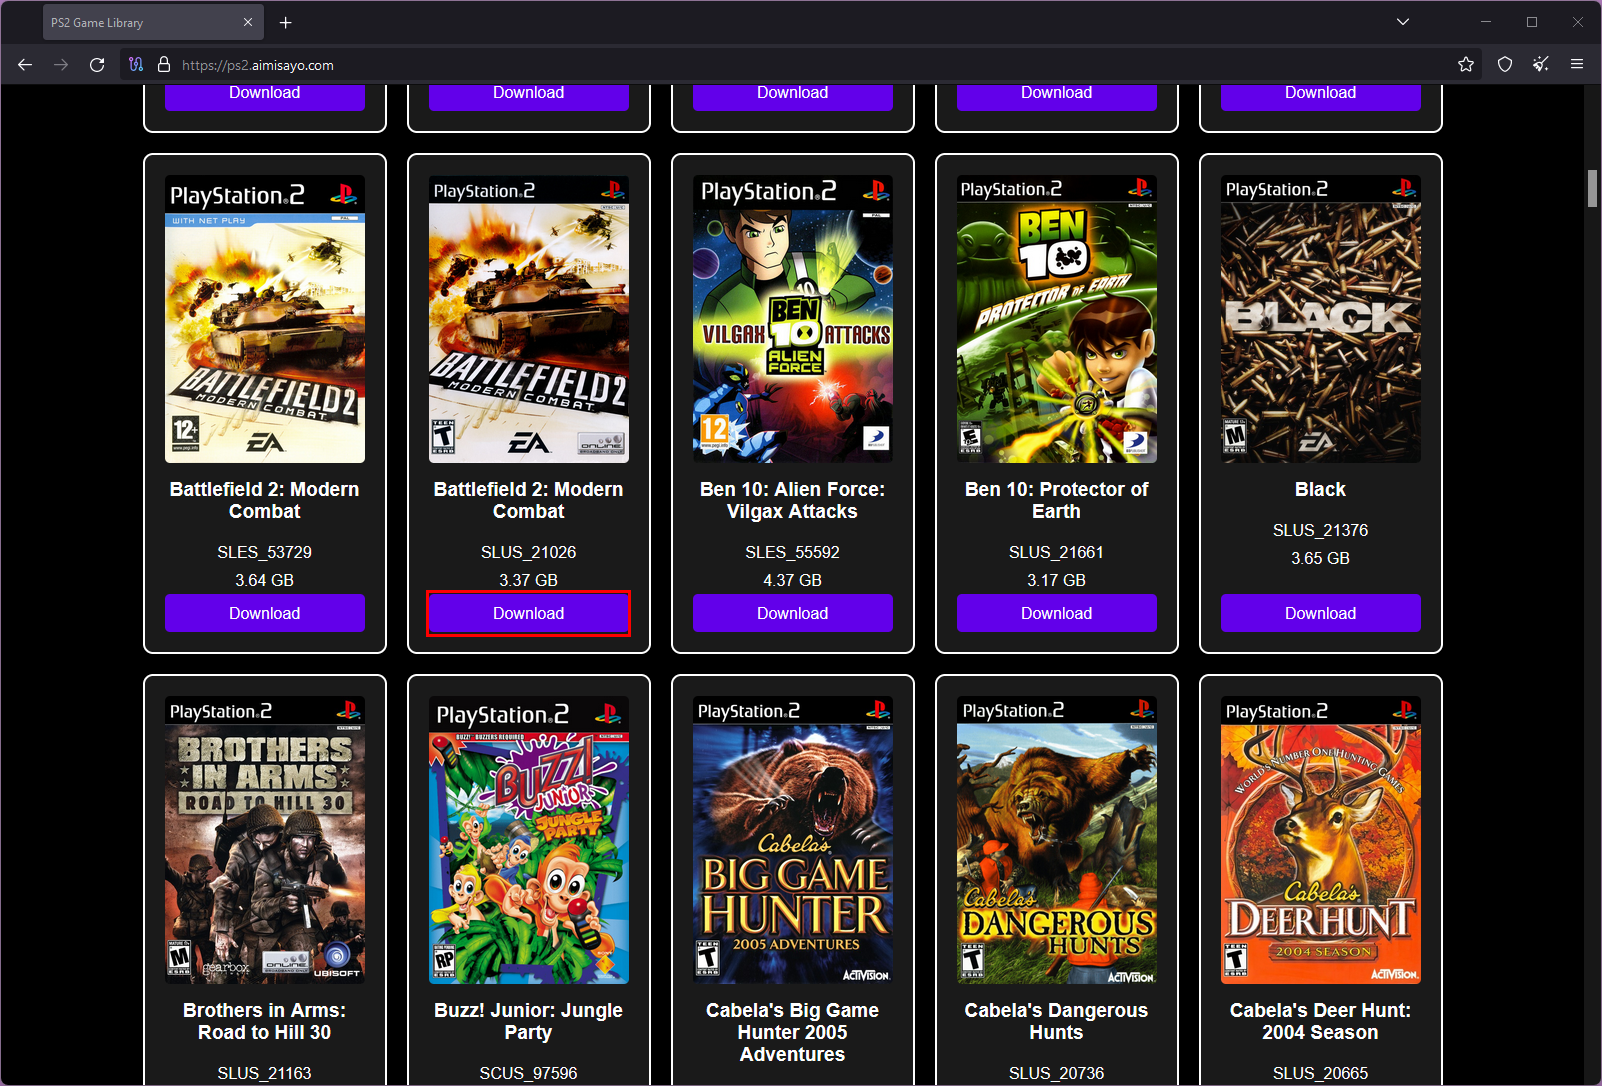
Step 5: Download Games
You can download games from any ROM site or from my server:
ps2.aimisayo.com
Games are uploaded in .iso format for easy use.
Note: PCSX2 supports multiple formats including .iso, .mdf, .chd, and more. However, .iso is the best-optimized format.
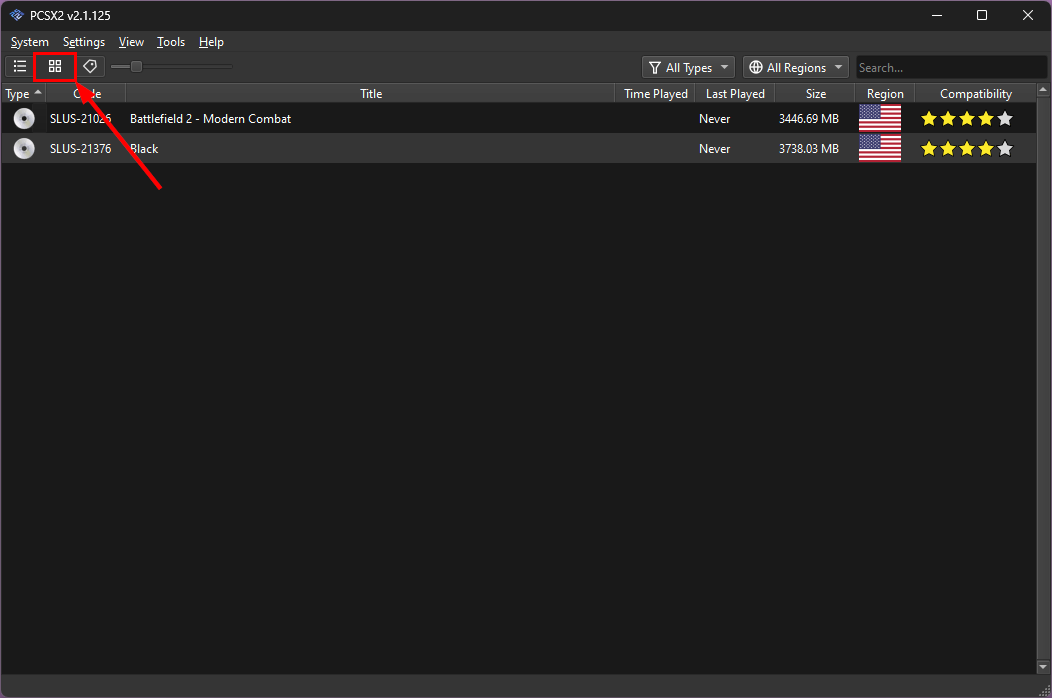
Step 6: Organize Games
-
Click the button with 4 squares to switch to grid view, making it easier to browse your games.
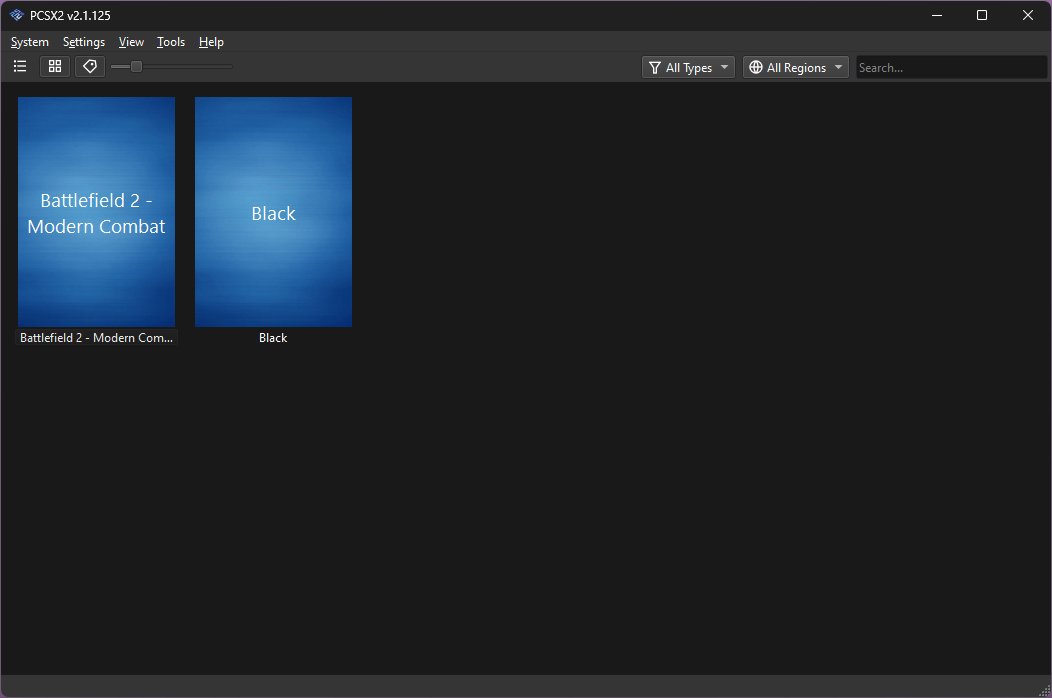
-
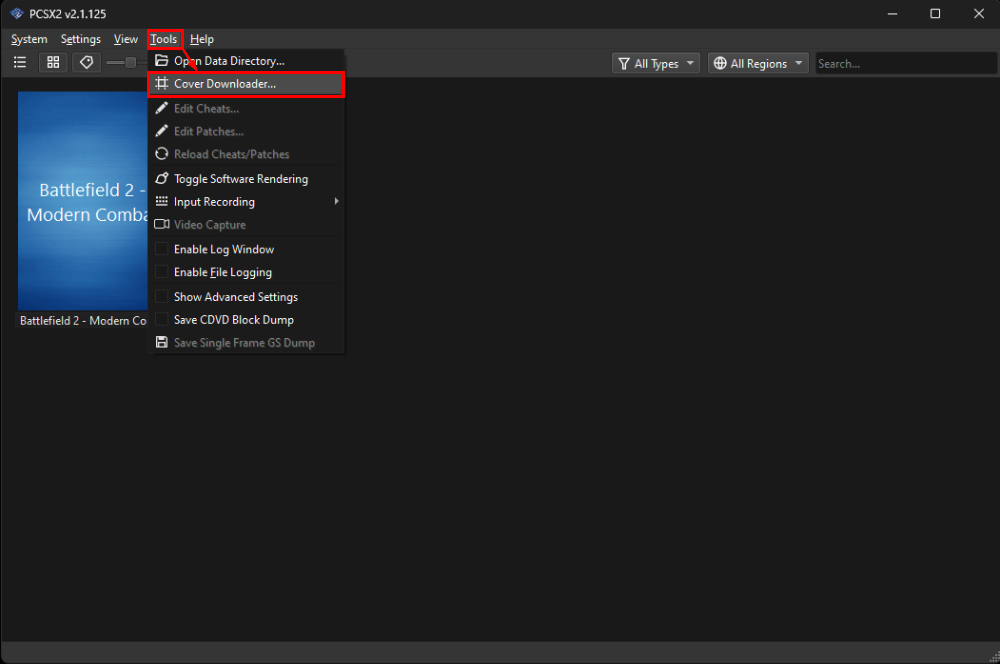
To download cover images, click Tools > Cover Downloader and paste the following URL:
https://raw.githubusercontent.com/xlenore/ps2-covers/main/covers/default/${serial}.jpg
Check the option Use Title File Names and click Start.
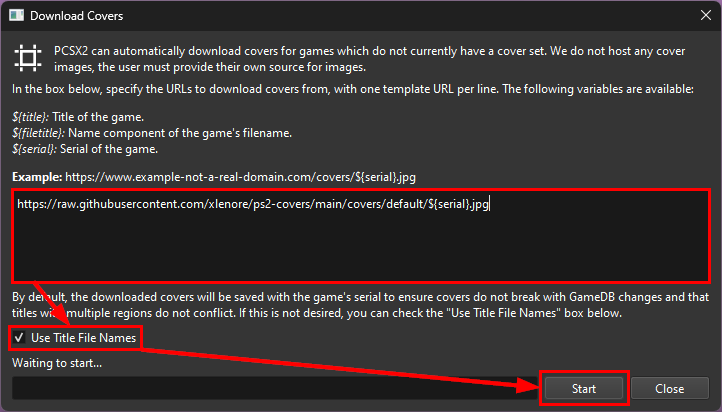
This will download the cover images, and your games will now look like this:
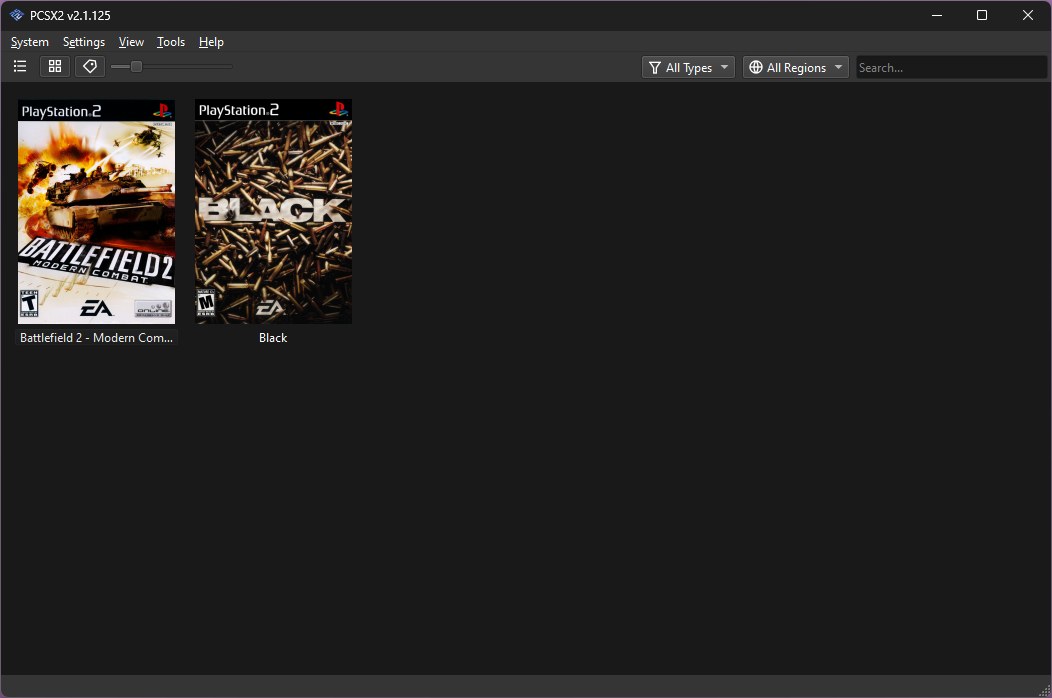
Step 7: Configure Interface Settings
To improve the user interface, follow the settings shown below:
Step 8: Configure Graphics Settings
These settings determine the graphics output of your games. The recommended settings depend on your hardware. If your PC meets or exceeds Intel Core i5 12600 / Ryzen 5 3600X / Nvidia RTX 3060 / Radeon RX 6600, you can use the settings below:
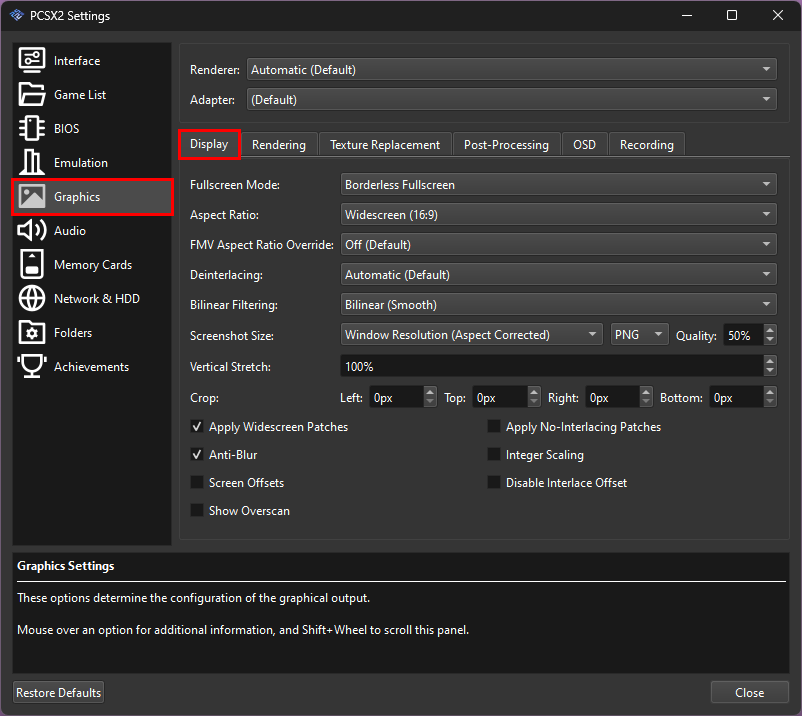
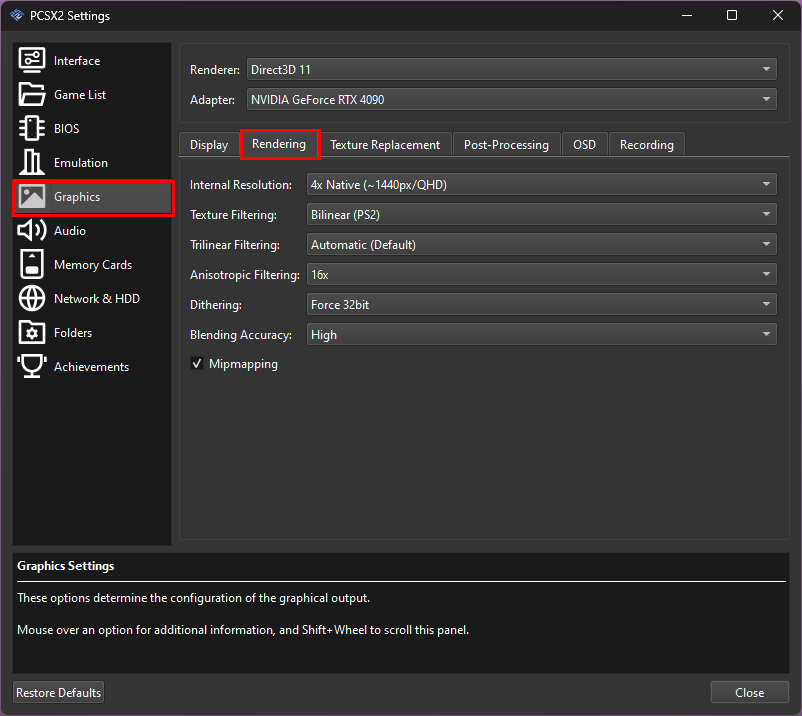
For lower-end hardware, adjust the settings to suit your system’s capabilities.
Key Graphics Settings:
- Renderer: Choose between Direct3D 11, OpenGL, or Vulkan, depending on your system.
- Internal Resolution: Controls the visual clarity. 4x Native (~1440p) is recommended.
- Texture Filtering: Smooths out textures. Bilinear (PS2) is the default.
- Anisotropic Filtering: Set to 16x for sharper textures at steep angles.
- Blending Accuracy: Set to High for the best visual effects, though this may reduce performance on low-end hardware.
Step 9: Configure Memory Card
You need to create a memory card to save game progress.
- Click Browse and select the memcards folder inside the PCSX2 directory.
- Click Create to generate a new memory card. Name it Mcd001 for compatibility, and select 8 MB (sufficient for most games).

Step 10: Managing Folders
Watch the video below to ensure your folders are set correctly for PCSX2.
By default, PCSX2 uses the My Documents folder for game data. It’s recommended to change this to the PCSX2 folder to avoid issues.
Step 11: Enable Game Patches
Patches enhance game performance and enable features like widescreen support and higher frame rates. To enable patches:
- Right-click on the game and select Properties.
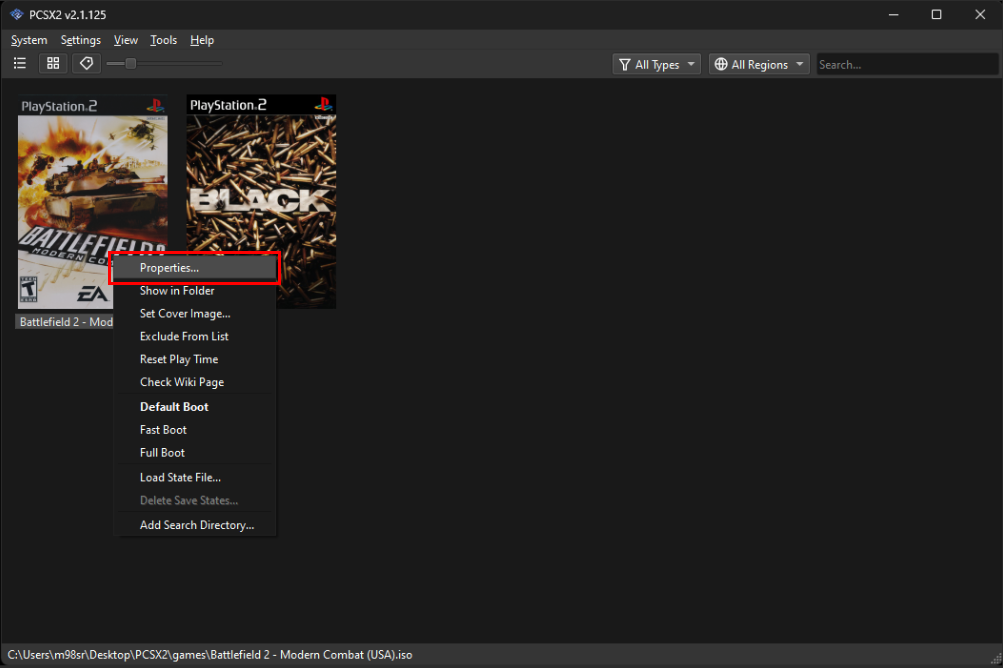
- Navigate to the Patches tab and enable the patches you need.
Note: Not all games have patches, but many popular titles do.

Now you can just close this window and double click on the game you want to play and enjoy.
Happy Gaming!